Good Old F5 Experience With OwinHost.exe on Visual Studio 2013
With Visual Studio 2013 RC, we are introduced to a new extensiblity point: External Host. This gives us the F5 experience Wwth OwinHost.exe on VS 2013 and this post walks you through this feature.
9 September 2013
5 minutes read
Related Posts


Since the first day I started developing software solutions for web on Visual Studio, I have had the 'F5' experience. It's nice, clean and easy to get up a web application running without digging through a specific exe file to invoke. After Cassini, our development environments have change a little with IIS Express, in a nice way of course. With the introduction of IIS Express, running it through the command line is also possible but we still have the ultimate F5 experience to get it up.
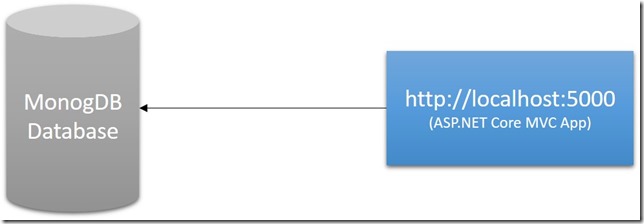
Today, we are still in love with IIS but with the introduction of OWIN, it's now much easier to build your application in an hosting agnostic way and Katana Project is providing components for hosting your application outside of IIS with a very thin wrapper on top of HttpListener. Actually, the HttpListener is one of the options in terms of receiving the HTTP request and sending back the response at the operating system level. The OwinHost.exe even abstracts that part for us. The OwinHost.exe is a very simple tool which will bring your application startup and the host layer together. Then, it will get out of your way.
However, the development environment with a custom executable tool can be very frustrating, especially in .NET ecosystem where we have really great tooling all over the place. Typically, if you would like to host your application with OwinHost.exe in your development environment, here is what you need to do:
- Create a class library project and install Microsoft.Owin package from MyGet ASP.NET Web Stack Nightlies feed.
- Add your startup class and build your pipeline with several OWIN middlewares inside the Configuration method.
- Add an assembly level attribute for OwinStartupAttribute to indicate your start-up class.
- Optionally, install the OwinHost.exe from the same feed into your project or install it any other place.
- Go to project properties window and navigate the "Build" pane. Change the "Output Path" from "bin\Debug\" or "bin\Release\" to "bin".
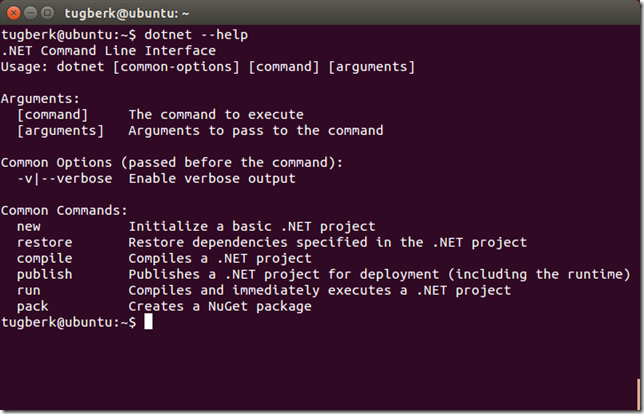
- Open up a command prompt window and navigate the root of your project.
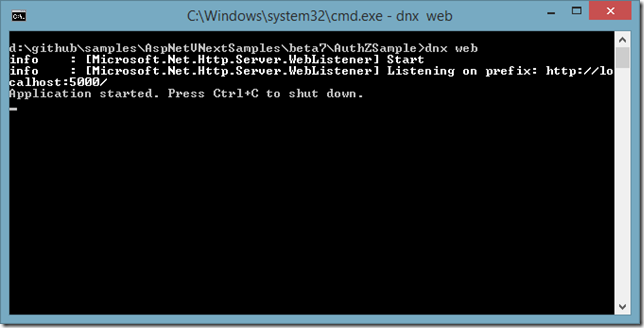
- Execute the OwinHost.exe from the command prompt window you have just opened up and here you have the running HTTP application.
First four steps are the ones that we are OK with but the rest is generally frustrating. What we really want there is to have the F5 experience that we are used to. With Visual Studio 2013 RC, we are introduced to a new extensibility point in Visual Studio: External Host. With this feature, we are now able to replace the host layer completely. Let's see how. First, let's create a new ASP.NET Web Application:

If you are new to this "One ASP.NET" idea, this window may seem a bit awkward at first but think this as an open buffet of frameworks and modules. After selecting this, we will see the open buffet window:

For our sample application, we can continue our merry way with the empty project template without any core references. However, the Visual Studio project will still include System.Web and its related references as shown in the below picture.

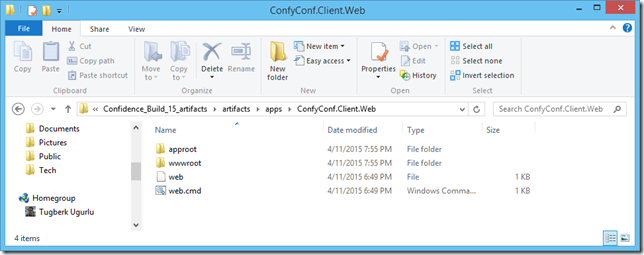
Including the web.config file, we can remove all of this System.Web related stuff now to run our pure OWIN based application. In some cases, we may need web.config though as OwinHost.exe uses it for some cases such as binding redirects. After removing these junks, we have a project as seen below:

As we mentioned before, Visual Studio 2013 RC has the external host extensibility support for web applications and we can see this extensibility point by opening the Properties window of the project.

You get the IIS Express and Local IIS out of the box with Visual Studio 2013 RC (and yes, Cassini is dead for God's sake). However, it's really easy to get in there and OwinHost NuGet package has the specific installation scripts to register itself as an external host. To get this feature from OwinHost, we just need to add it into our project through NuGet. Today, OwinHost 2.0.0-rc1 package is available on NuGet.org and when we install the package, we get a warning popup from Visual Studio:

When we accept the integration, we can see the OwinHost showing up inside the external servers list.
If you select the OwinHost option, we can see the option which we can configure if we need to.

All these information is stored inside the project file (csproj if you are on C#):

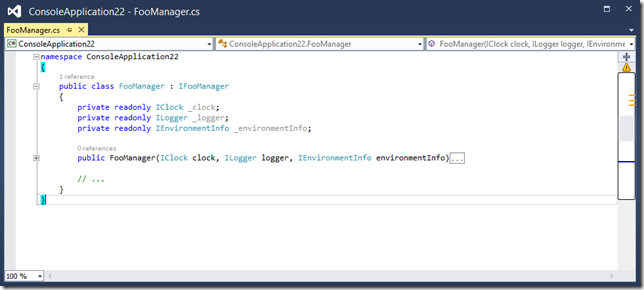
Now, I can build my OWIN pipeline and have it running on top of OwinHost.exe just by pressing F5 inside the Visual Studio 2013. For demonstration purposes, I wrote up the following Startup class:
using Microsoft.Owin;
using Owin;
using OwinHostVsIntegrationSample;
using System.IO;

[assembly: OwinStartup(typeof(Startup))]
namespace OwinHostVsIntegrationSample
{
    public class Startup
    {
        public void Configuration(IAppBuilder app)
        {
            app.Use(async (ctx, next) =>
            {
                TextWriter output = ctx.Get<TextWriter>("host.TraceOutput");
                output.WriteLine("{0} {1}: {2}",
                    ctx.Request.Scheme, ctx.Request.Method, ctx.Request.Path);

                await ctx.Response.WriteAsync("Hello world!");
            });
        }
    }
}
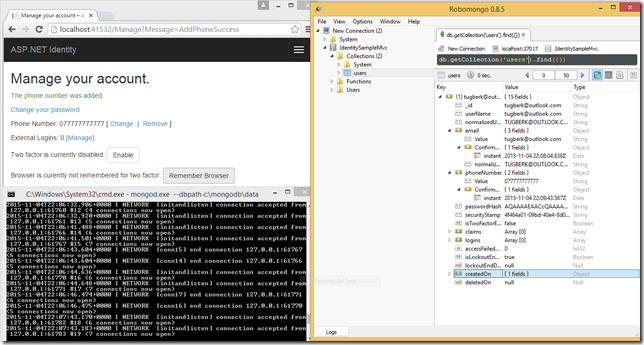
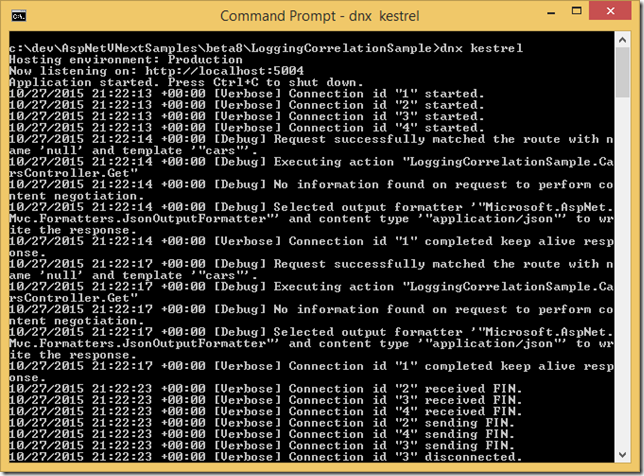
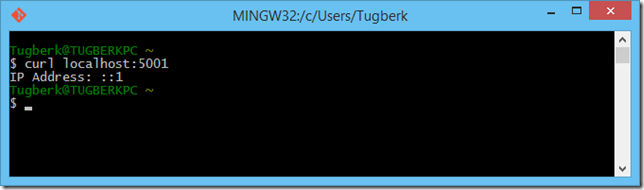
When I press CTRL + F5, I have my Web application running without debugging on top of OwinHost.exe:

Very nice and elegant way of running your application with a custom server! Besides this, we can certainly run our application in debug mode and debug our OWIN pipeline. If you press F5 to run your web application in debug mode, the VS will warn you if you don't have a Web.config file:
Not sure why this is still needed but after selecting the first choice, VS will add a web.config file with the necessary configuration and we can now debug our middlewares:

Very neat. This sample I demonstrated is also available on GitHub. Enjoy the goodness :)

Hey, I'm Tugberk 👋
Coder 👨🏻💻, Speaker 🗣, Author 📚, ex-Microsoft MVP 🕸, Blogger 💻
I live in London, UK 🏡
