How to Use Octopus Deploy Step Templates for SQL Release
Related Posts
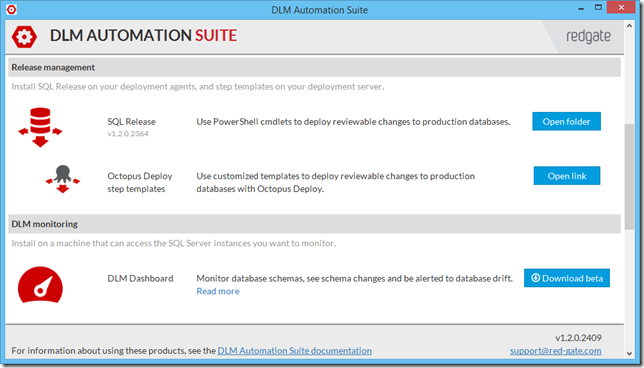
SQL Release, a set of PowerShell cmdlets from Redgate which automate deploying changes to your production databases, went out of beta and became part of DLM Automation Suite a few days ago. As part of this release, Octopus Deploy step templates for SQL Release are also included inside the suite and in this post, I will go through how you can use these step templates to make the Octopus Deploy Integration of SQL Release easier by going through one of the deployment flows (the recommended one).
If you are trying to integrate your SQL Server databases into your deployment pipeline, I strongly encourage you to try DLM Automation Suite out. At the time of this writing, it has 28-day free trial option. You can also check out the documentation page for DLM Automation Suite documentation and information about included products.
Installing SQL Release Step Templates
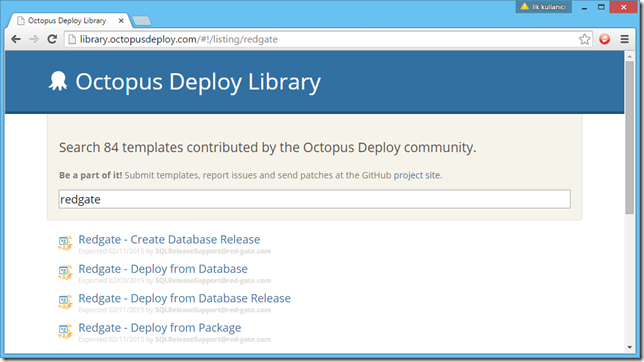
If you are not familiar with Step Templates, it’s a plugin mechanism that Octopus Deploy has which allows you to get the input from the user through a nice UI and run specific PowerShell script based on the input passed in. A step template is nothing but a structured JSON text and they are hosted inside the Octopus Deploy Step Templates library. They actually don’t need to be hosted there in order for you to use them but it makes it very convenient to find one in a central place.
SQL Release has four step templates to satisfy different flows and use cases.
First thing to do in my demo blog post here is to install these step templates into your Octopus server. The way to install a step template is a little different that you might expect.
- Go inside a step template page on Octopus Deploy Library web site.
- Hit "Copy to clipboard" button on the right hand side.
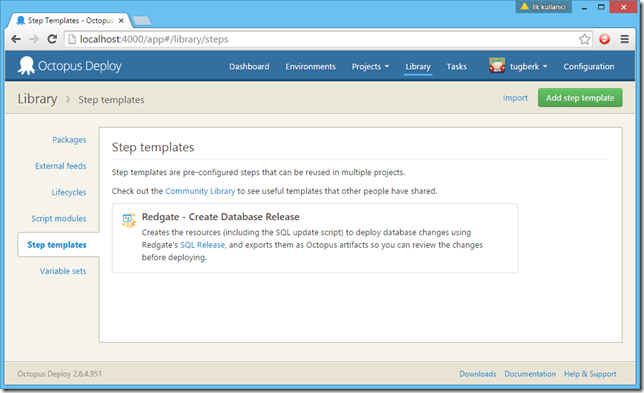
- Go to your Octopus server and navigate to Library (on the top menu)
- You should see the "Step templates" pane on the left side. This will open up the step templates page for your Octopus server.
- On that page, hit "Import", paste the step template inside the text area and click "Import".
You will end up with a look similar to the following one:
After I imported all the step templates for SQL Release, it is time to actually create the deployment process. We will be using only two of these in our example here.
In order to use the SQL Release step templates, you need to have SQL Release installed inside the Octopus Tentacle machine. If you install SQL Release while the Tentacle is running, you need to restart the Tentacle service (through the Tentacle Manager, for example).
Setting up the Octopus Project
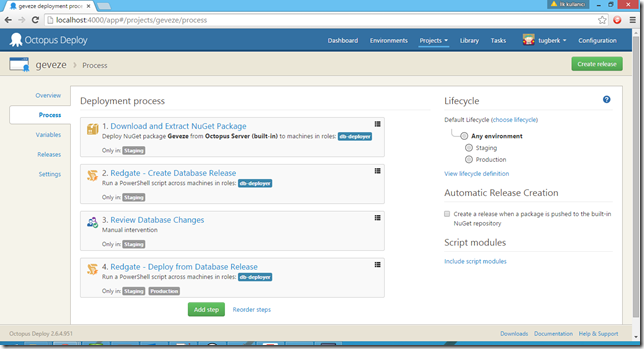
Before going through each step of the deployment process, I wanted first show the end look of the Octopus project.
At the end, we will have four steps to complete our deployment for this example. A few more things to point out:
- We will be only deploying the database for the purpose of this demo but you can imagine having your application deployment here as well.
- We will deploy the database schema changes in two steps in order to allow review and approval of the script.
Download and Extract NuGet Package Step
First step will be to download and extract the NuGet package which contains the scripts folder for the database schema state. This NuGet package will be produced by another DLM Automation Suite tool named SQL CI, a plugin for your CI tool that allows continuous integration for SQL Server databases. The script folder I mentioned here can be produced by a few Redgate tools such as SQL Source Control. The script folder I am using for this sample is hosted on my GitHub repository.
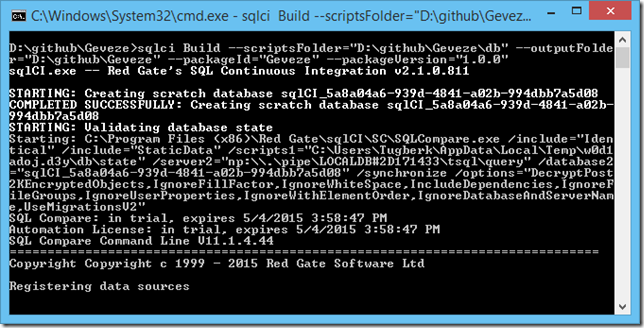
In order to create a package, I fired the following SQL CI command:
sqlci Build --scriptsFolder="D:\github\Geveze\db" --outputFolder="D:\github\Geveze" --packageId="Geveze" --packageVersion="1.0.0"
When I have the package created, I pushed it to Octopus Deploy NuGet feed using NuGet Command Line tool:
nuget push Geveze.1.0.0.nupkg -ApiKey API-CMGMYZ1GM95FHJNLWVRQQGQRAPK -Source http://localhost:4000/nuget/packages
Typically, these steps would be performed inside your CI Server but I didn’t want to have CI integration in order not to complicate things more for this demo. Also, check out the SQL CI Documentation for more information about the command line options and other related stuff. We won’t go into details about this tool in this post.
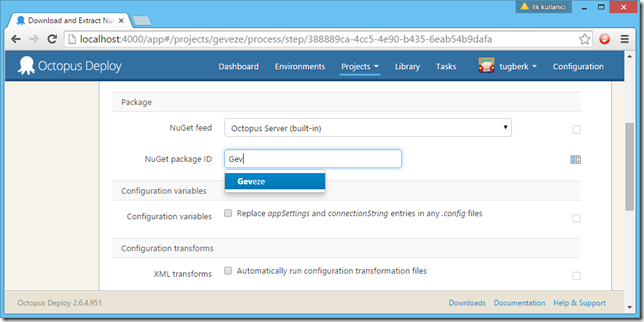
Once I pushed the package to Octopus Deploy NuGet feed, I was able to see the package while I was configuring the step:
Create Database Release Step
This is probably the most important step in our process. Here, SQL Release will create the actual changes script and bunch of other artifacts that can be used later. These will be generated based on the package it will obtain from the previous package and the target database which will be used for compression.
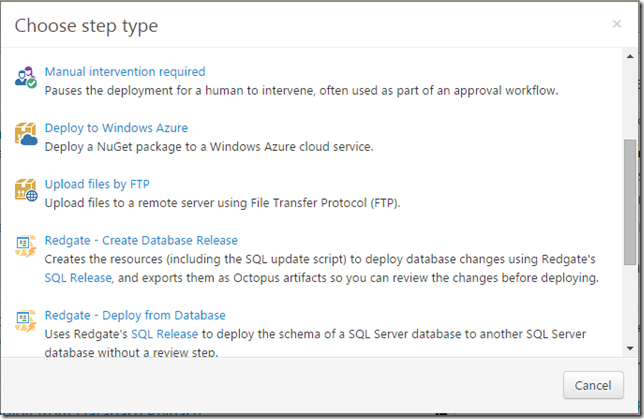
In order to add a "Create Database Release Step", you need to hit "Add step" on the Project > Process page. From the "Choose step type" window, choose "Redgate - Create Database Release" option.
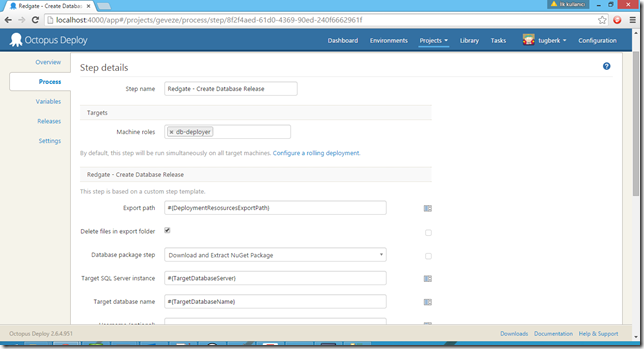
The step configuration will look something like below:
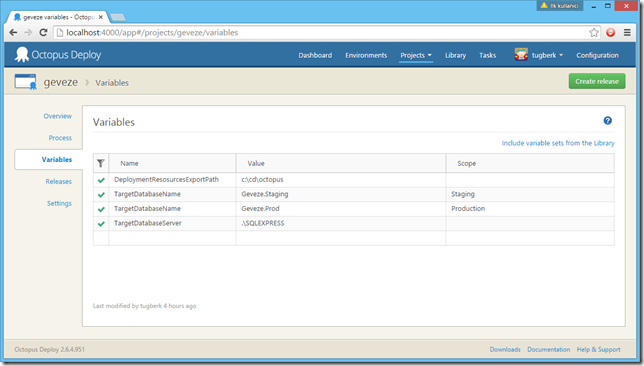
As you can see, I am using Octopus Deploy variables here. The ones that I have are as shown below:
Also note that I configured this step to be only run for the staging environment which will basically allow you to reuse the generated changes script to be deployed to production environment. This also means that reviewed script will be used in all deployments. As a final note: SQL Release will fail if the state of the target database is drifted from the compression state which makes the whole process safer.
The next step is "Review Database Changes" which is a standard Octopus Deploy manual intervention and approval step. I will skip that step here as the documentation is pretty straight forward on this.
Deploy from Database Release Step
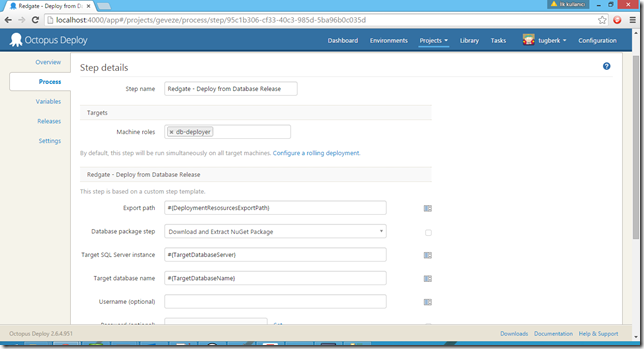
The last step is for actually deploying the changes. Once the sign-off is given, the changes to the database can be deployed. In order to start configuring this step, choose the "Redgate - Deploy from Database Release" step type from the "Choose step type" window. The configuration will look something like below:
One big difference here is that this step will be executed on both Staging and Production environments. In fact, this step is the only step that will run against the Production environment in our example here.
Create a Release and Deploy
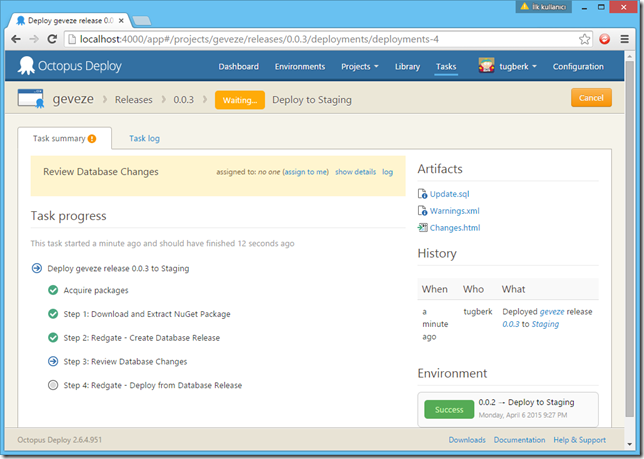
We are now ready to create a release (alternatively, you can take advantage of "Automatic Release Creation" feature of Octopus Deploy) and deploy to staging. When you start the deployment, it will pause on the manual intervention step as expected and we will see a few artifacts created on right hand side.
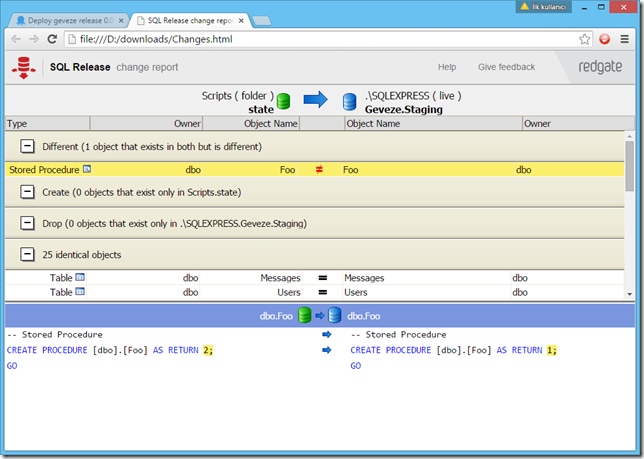
You can see the update script, warnings and an HTML report for the changes. If you click on the Changes.html file, it will be download and you can open it up with your choice of web browser. It will give you a nice diff report.
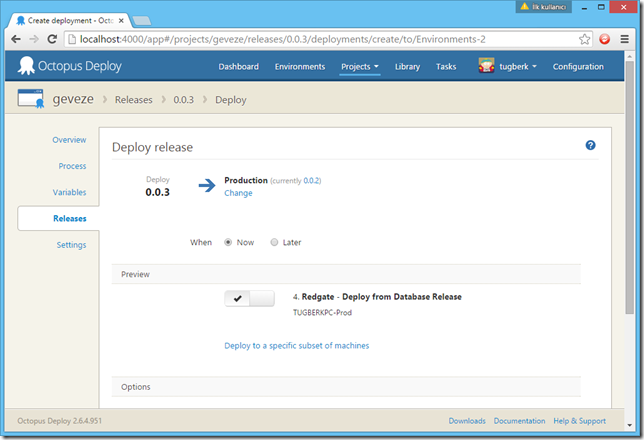
Once you approve, the deployment will go on and the last step will run to actually deploy the changes. When you are happy with the staging environment, you can deploy the changes to Production by clicking the Promote button on Octopus server.
As you can see, only step will run here is the last one. Remember that if the either of the database are drifted between the time of release creating and deployment, SQL Release will fail to deploy to make the process safer.
Obviously, SQL Release and its Octopus Deploy step templates make it easier to integrate with Octopus Deploy for deploying database schema changes in a safe and reliable way. If you feel that you are already struggling with making your database as part of your continuous delivery story, definitely try DLM Automation Suite and SQL Release out. You can also give feedback to SQL Release on its Uservoice page.
