Distributed Caching in .NET Core with PostSharp and Redis
On my previous post, I walked through the benefits of using PostSharp for caching in a .NET Core server application, by making it work on a single node application. In this post, we will see how we can enable Redis as the caching backend through PostSharp's modular nature.
3 July 2019
2 minutes read
Related Posts


On my previous post, I walked through the benefits of using PostSharp for caching in a .NET Core server application. However, the example I have showed there would work on a single node application but as we know, probably no application today works on a single node. The benefits of deploying into multiple nodes are multiple such as providing further fault tolerance, and load distribution.
Luckily for us, PostSharp caching backend is modular and the default in-memory one I have used in my previous post can be swapped. One of the out of the box implementations is based on Redis, which is a highly scalable, distributed data structure server solution. One of the widely use cases of Redis is to be used as a ephemeral key/value store to power the caching needs of the apps.
Run Redis Locally
The best way to run Redis locally is through Docker. Let’s run the below code to do this:
docker run --name postsharp-redis -p 6379:6379 -d redis a30f1c1e991e0159fb5f96dfb053f50c50726101907c7f76d319d5e987a6cf3a
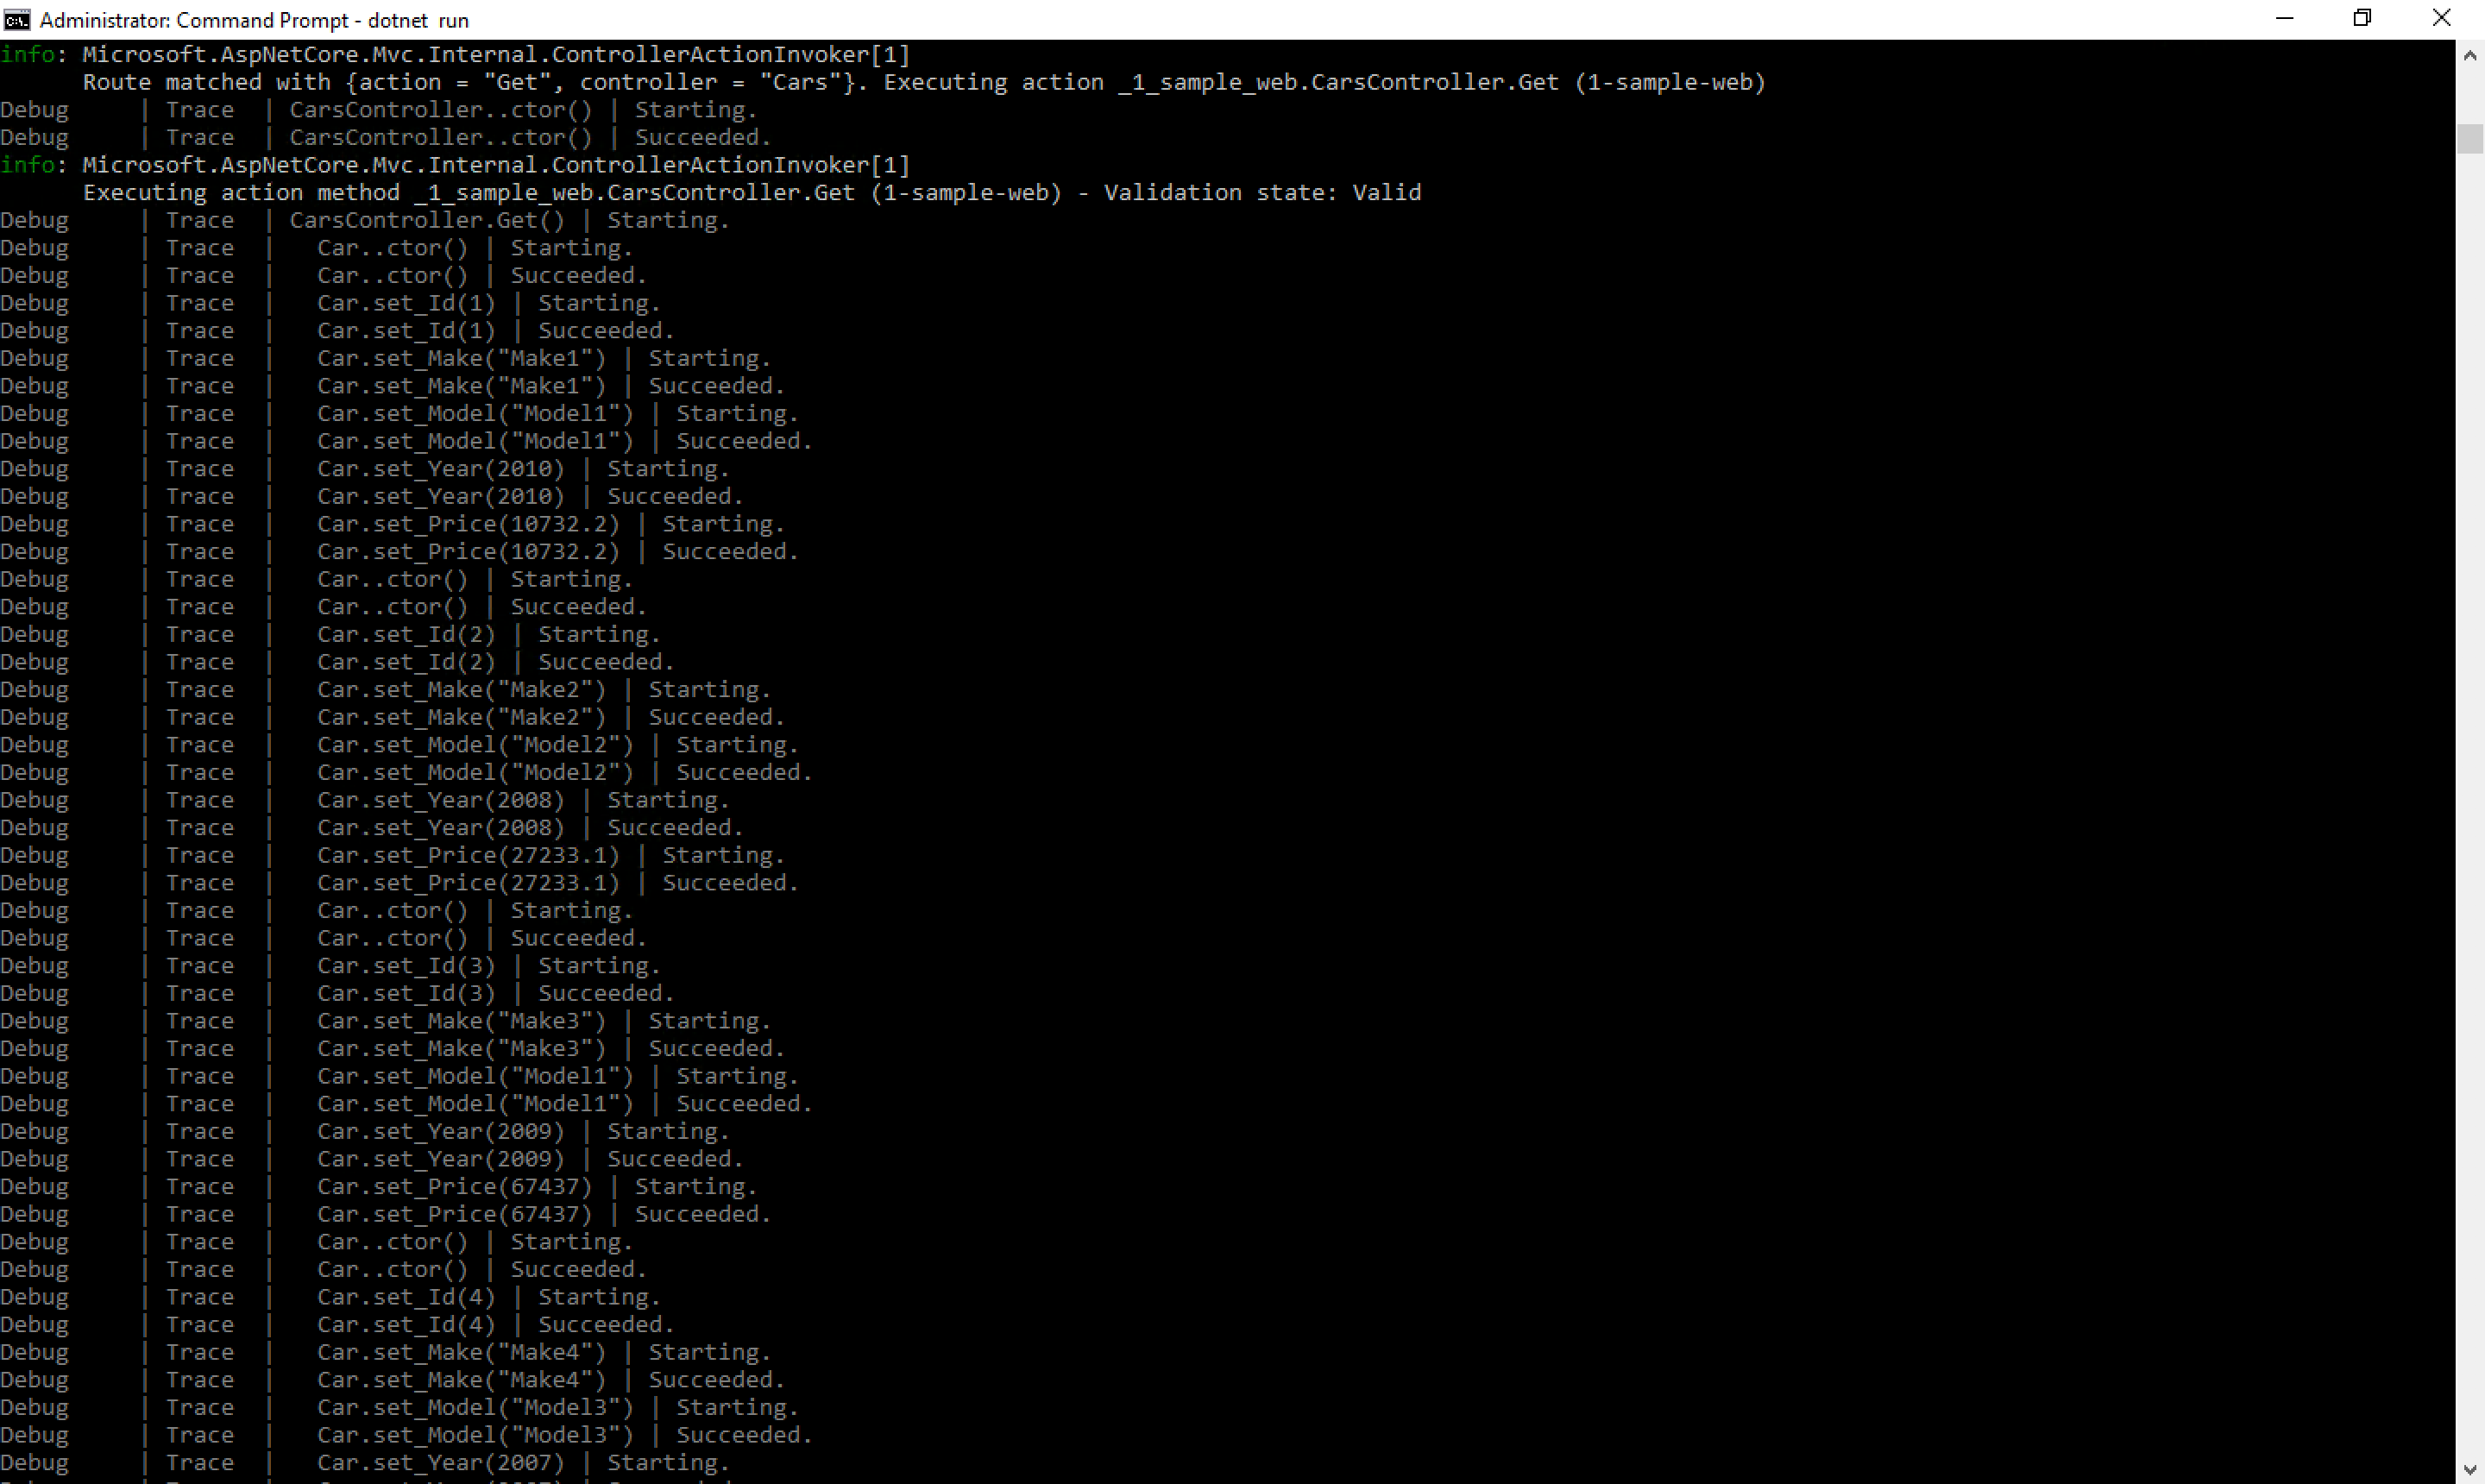
We have just got a redis instance up and running on our local environment and exposed it through TCP port mapping to the host machine to be available at port 6379. The final thing we need to do to get this ready for PostSharp usage is to set up the key-space notification to include the AKE events. You can see the Redis notifications document for details on this.
Configure for Redis Cache
First thing to do is to install the NuGet package which contains the Redis caching backend implementation for PostSharp.
dotnet add package PostSharp.Patterns.Caching.Redis --version 6.2.8
Then, all we need to do is to change the caching backend to be the Redis implementation, which we have configured inside our Program.Main method in the previous post:
string connectionConfiguration = "127.0.0.1";
var connection = ConnectionMultiplexer.Connect(connectionConfiguration);
var redisCachingConfiguration = new RedisCachingBackendConfiguration();
CachingServices.DefaultBackend = RedisCachingBackend.Create(connection, redisCachingConfiguration);
Notice the server address we have entered, that points to the Redis instance we have got up and running through Docker and exposed to the host through port mapping. As we used the default Redis port, we didn’t need to state it explicitly.
From this point forward, our app is all ready to run with Redis caching enabled, without a single line of code change on the app components. Only change we had to do was on the configuration side.
For production, it’s worth getting a hold of the Redis server address through a configuration system such as the one provided with ASP.NET Core so that you can swap it based on your environment.

Hey, I'm Tugberk 👋
Coder 👨🏻💻, Speaker 🗣, Author 📚, ex-Microsoft MVP 🕸, Blogger 💻
I live in London, UK 🏡
