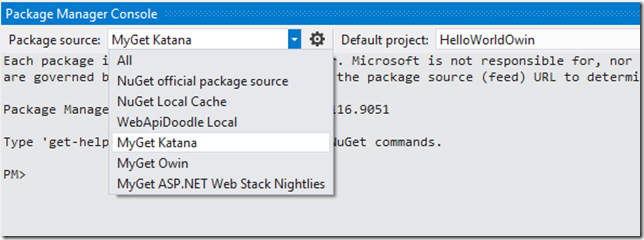
.NET Core Runtime RC2 has been released a few days ago along with .NET Core SDK Preview 1. At the same time of .NET Core release, ASP.NET Core RC2 has also been released. While I am migrating my projects to RC2, I wanted to write about how I am getting each stage done. In this post, I will show you the tooling aspect of the changes.
.NET (75)

Moving to ASP.NET Core RC2: Tooling
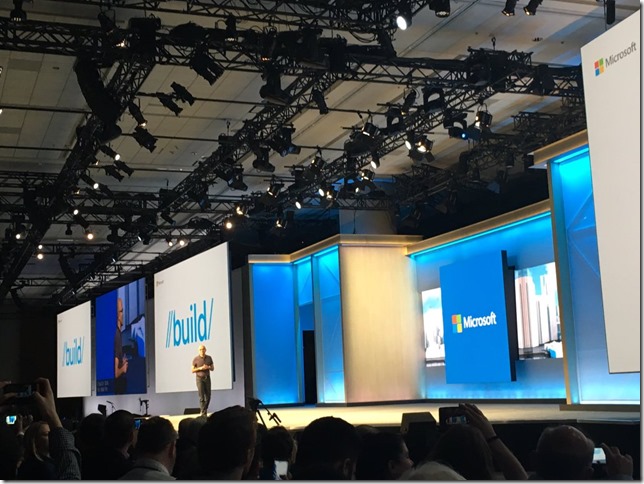
Microsoft Build 2016 in a Nutshell
Two weeks ago, I had an amazing opportunity to be at Microsoft Build Conference in San Francisco and I would like to share my experience about the conference with you in this post by highlighting what has happened and giving you my personal takeaways.
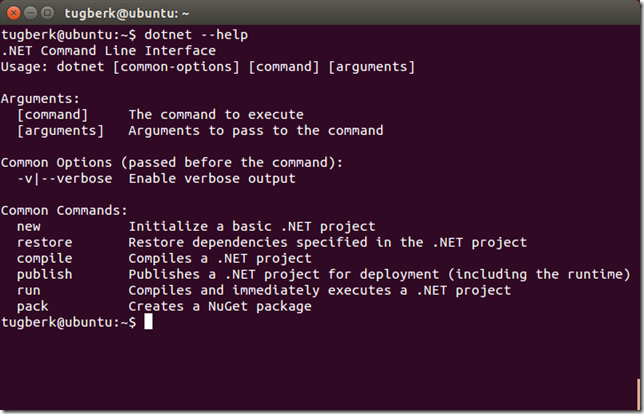
Having a Look at dotnet CLI Tool and .NET Native Compilation in Linux
dotnet CLI tool can be used for building .NET Core apps and for building libraries through your development flow (compiling, NuGet package management, running, testing, etc.) on various operating systems. Today, I will be looking at this tool in Linux, specifically its native compilation feature.
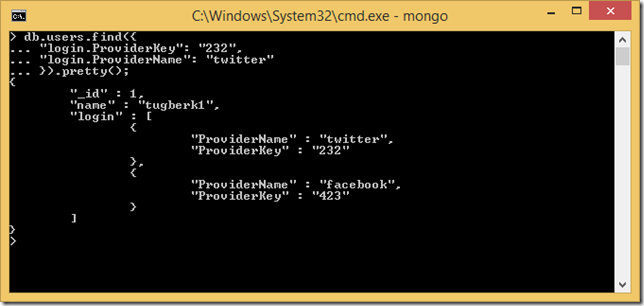
Integration Testing with MongoDB with MongoDB.Testing Library
I have put together a library, MongoDB.Testing, which makes it easy to stand up a MongoDB server, create a random database and clean up the resources afterwards. Here is how you can start using it.

My Talk on Profiling .NET Server Applications from Umbraco UK Festival 2015
I was at Umbraco UK Festival 2015 in London a few weeks ago to give a talk on Profiling .NET Server Applications and the session is now available to watch.
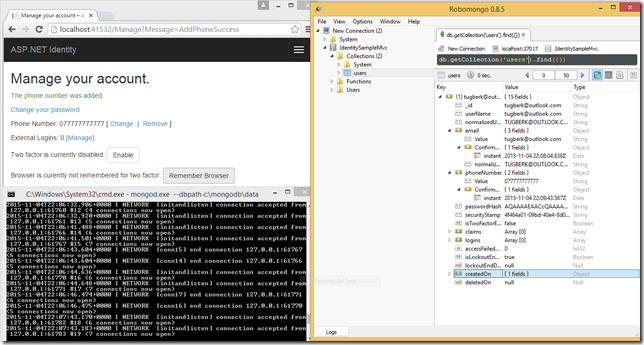
ASP.NET 5 Identity MongoDB Implementation
ASP.NET Identity will have a new version with ASP.NET 5 which is going to be version 3.0.0 and I gave it shot to implement ASP.NET Identity MongoDB data store.
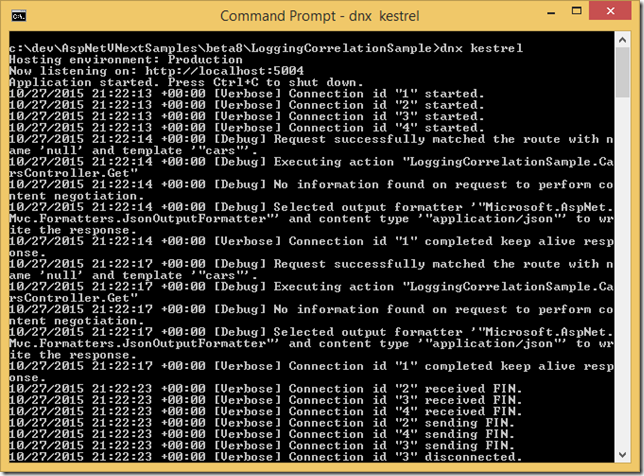
ASP.NET 5 and Log Correlation by Request Id
ASP.NET 5 is full of big new features and enhancements but besides these, I am mostly impressed by little, tiny features of ASP.NET 5 Log Correlation which is provided out of the box. Let me quickly show you what it is in this post.
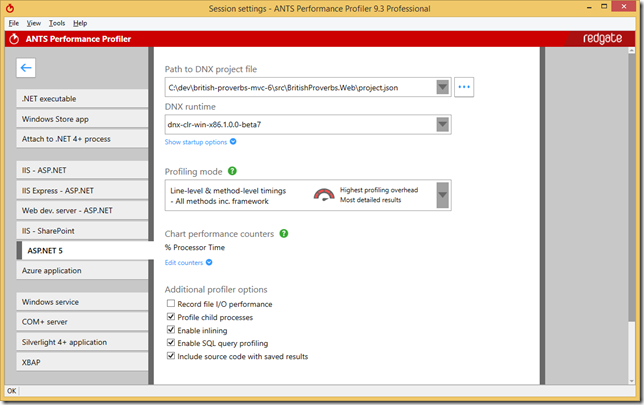
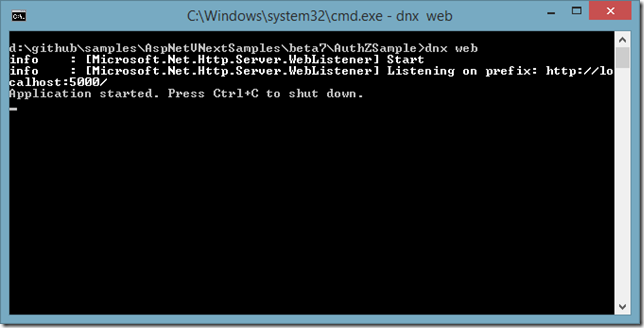
Profiling ASP.NET 5 Applications with ANTS Performance Profiler
ANTS Performance Profiler from Redgate supports ASP.NET 5 applications running on DNX and it allows you to profile your ASP.NET 5 applications to spot performance problems in a really easy and unobtrusive way. In this blog post, I will show you how it can help you with a sample.
Setting IHostingEnvironment.IsDevelopment as True in an ASP.NET 5 Application
Wondering why IHostingEnvironment.IsDevelopment returns false even when you are on you development machine? I did indeed wonder and here is why :)

Speaking at Web European Conference 2015 in Milan
Web European Conference 2015 will happen in Milan on the 26th of September and I will be talking about ASP.NET 5 there!
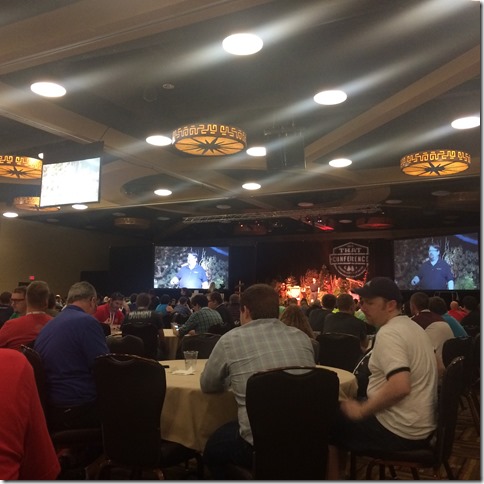
That Conference 2015 and My ASP.NET 5 Talk
This week, I had the privilege to attend That Conference as a speaker to give a talk on ASP.NET 5. Here is a quick blog post on my conference experience.

Progressive .NET Tutorials 2015 and Recording Videos of My ASP.NET 5 Talks
Last Friday, I was at Progressive .NET Tutorials 2015 in London and I gave two talks on ASP.NET 5. Here are the recording videos and slides of my two ASP.NET 5 talks!
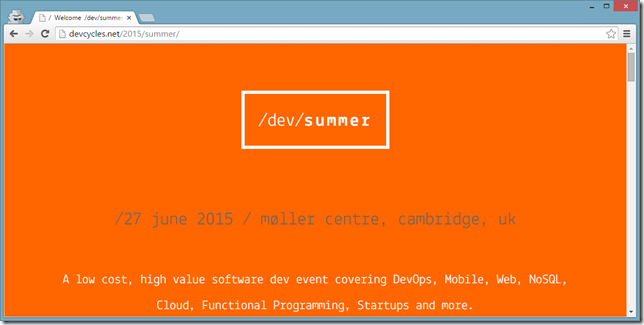
Upcoming Conferences That I am Speaking at
I have a few speaking activities lined up in upcoming weeks on ASP.NET 5 and DLM and I thought it would be good to share these with you all :)
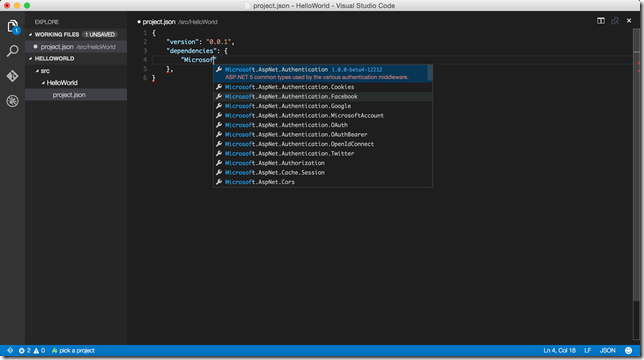
First Hours with Visual Studio Code on Mac and Windows
Today is one of those awesome days if you build stuff on .NET platform. They announced bunch of stuff during Build 2015 keynote and one of them is Visual Studio Code, a free and stripped down version of Visual Studio which works on Mac OS X, Linux and Windows. Let me give you my highlights in this short blog post :)
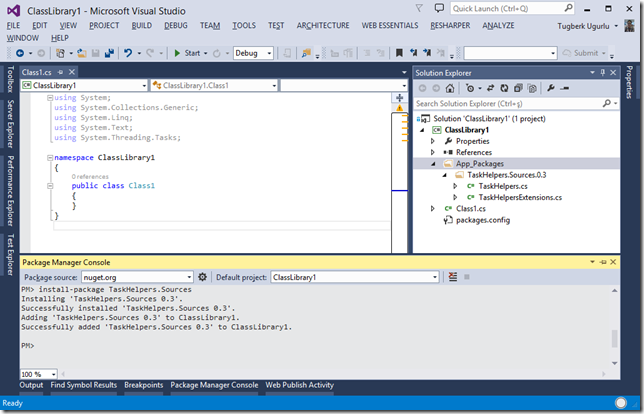
Exciting Things About ASP.NET 5 Series: Build Only Dependencies
In this very exciting post, I would like to talk about build only dependencies whose code can be compiled into target project and the dependency won’t be shown as a dependency.

Compiling C# Code Into Memory and Executing It with Roslyn
Let me show you how to compile a piece of C# code into memory and execute it with Roslyn. It is super easy if you believe it or not :)
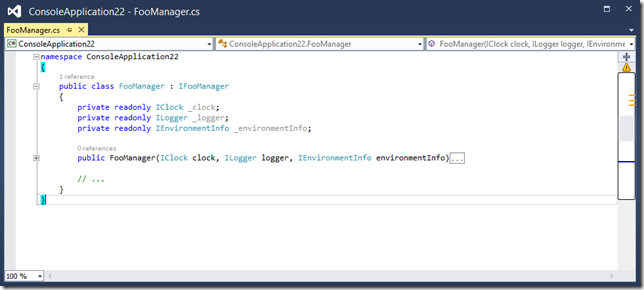
Dependency Injection: Inject Your Dependencies, Period!
Reasons on why I prefer dependency injection over static accessors.
Exciting Things About ASP.NET vNext Series: MVC View Components
A few days ago, I started a new blog post series about ASP.NET vNext. Today, I would like to talk about something which is MVC specific and takes one of our pains away: view components :)
Debugging ASP.NET vNext Beta Builds with Visual Studio 14 CTP 3
Visual Studio CTP 3 has launched a while back and I was expecting to have trouble working with ASP.NET vNext beta builds. I was partially right. I wasn’t able to run the web application from Visual Studio. However, it’s still possible to debug the application and I have a workaround for you :)
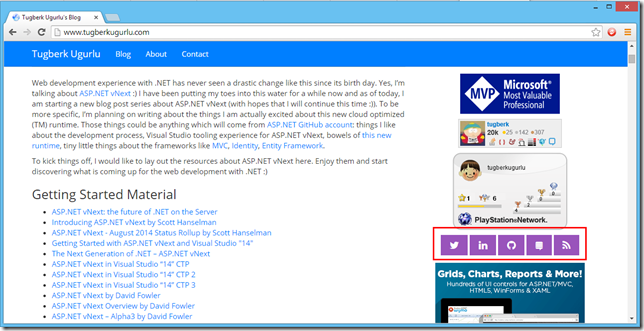
Exciting Things About ASP.NET vNext Series: The Ultimate Guide
As of today, I am starting a new blog post series about ASP.NET vNext. To kick things off, I would like to lay out the resources about ASP.NET vNext here which is probably going to be an ultimate guide on ASP.NET vNext.

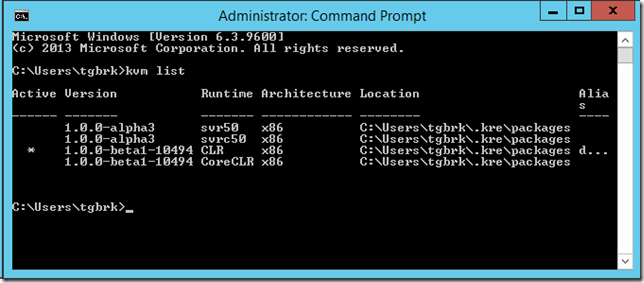
Getting Started with ASP.NET vNext by Setting Up the Environment From Scratch
In this post, I'll walk you through how you can set up your environment from scratch to get going with ASP.NET vNext.
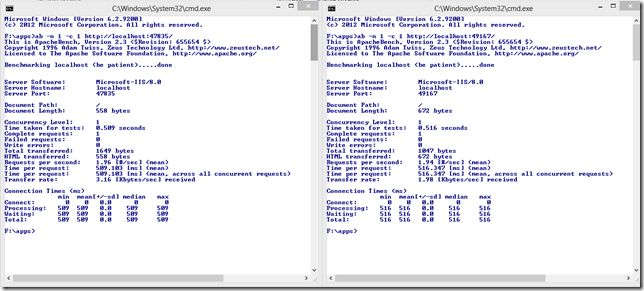
Efficiently Streaming Large HTTP Responses With HttpClient
Downloading large files with HttpClient and you see that it takes lots of memory space? This post is probably for you. Let's see how to efficiently streaming large HTTP responses with HttpClient.
Order of Fields Matters on MongoDB Indexes
Order of Fields Matters on MongoDB Indexes. Let's see how with an example.
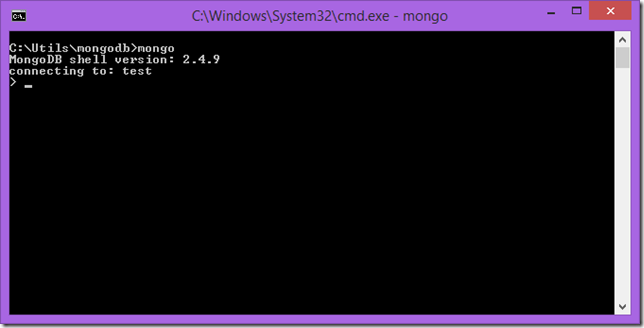
A C# Developer's First Thoughts on MongoDB
After working with RavenDB over the year, I just started looking into MongoDB. I worked with MongoDB a year ago or so in a small project but my knowledge was mostly rusty and I don't want that to happen again :) So, here I'm, documenting what my second thoughts are :)
AspNet.Identity.RavenDB: Fully asynchronous, new and sweet ASP.NET Identity implementation for RavenDB
A while back, ASP.NET team has introduced ASP.NET Identity, a membership system for ASP.NET applications. Today, I'm introducing you its RavenDB implementation: AspNet.Identity.RavenDB.
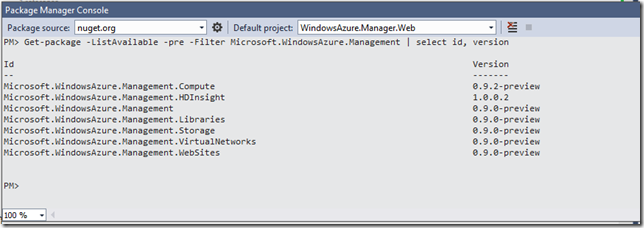
Windows Azure Management Client Libraries for .NET and It Supports Portable Class Library
One of the missing pieces of the Windows Azure story is within our reach now! A few days ago Azure folks have released Windows Azure .NET Management Client Libraries
Short Introduction Video for OWIN and Project Katana
I've recorded a short video which covers the brief introduction of OWIN and Project Katana. That short video will give you an idea about OWIN and Project Katana.
Pro ASP.NET Web API Book is Shipped and Available on Amazon
Today, I am very proud to say that Pro ASP.NET Web API Book is now shipped and available on Amazon for paperback sales :)
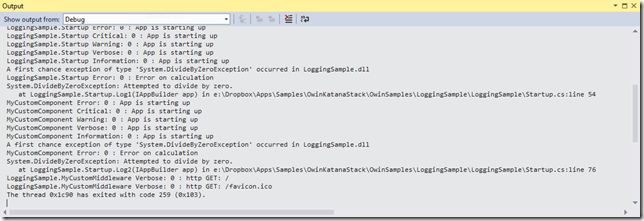
Logging in the OWIN World with Microsoft.Owin: Introduction
Microsoft implementation of OWIN (Microsoft.Owin or Katana for now) has a great logging infrastructure and this post will walk you through the basics of this component.
Owin.Dependencies: An IoC Container Adapter Into OWIN Pipeline
Owin.Dependencies is an IoC container adapter into OWIN pipeline. This post will walk you through the Autofac IoC container implementation and ASP.NET Web API framework adapter for OWIN dependencies.
Microsoft Turkey Summer School Presentation Samples and Links for .NET Web Stack
I was at Microsoft's Turkey headquarters giving talks on Microsoft Web Stack for Microsoft Summer School and here are presentation samples and links for .NET Web Stack
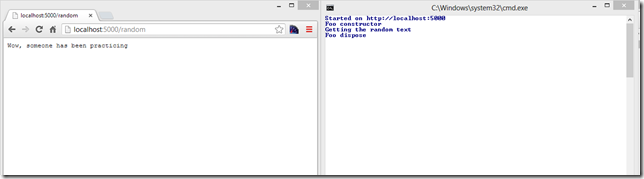
Getting Started With OWIN and the Katana Stack
OWIN and Katana is best way to build web server indipendent web applications in .NET ecosystem and this post will help you a bit on getting started.

Autofac Open Generics Feature to Register Generic Services
Autofac, an awesome IoC container for .NET platform, has an out of the box generic service registration feature which we will quickly cover in this blog post.
Hierarchical Resource Structure in ASP.NET Web API
This post explains the concerns behind the hierarchical resource structure in ASP.NET Web API such as routing, authorization and ownership.

ASP.NET Web API Tracing and IDependencyScope Dispose Issue
If you enabled tracing on your ASP.NET Web API application, you may see a dispose issue for IDependencyScope. Here is why and how you can workaround it.

Clean, Better, and Sexier Generic Repository Implementation for Entity Framework
With the new release of the GenericRepository.EntityFramework package, we now have clean, better and sexier generic repository implementation for Entity Framework. Enjoy!

Sides and Source Code for DEU Bilgisayar Topluluğu Izmir 2. Teknoloji Zirvesi
This weekend, I participated in an event as a speaker in Izmir, DEU Bilgisayar Topluluğu Izmir 2. Teknoloji Zirvesi. Sides and Source Code for my sessions are available.

List of Resources on Asynchronous Programming for .NET Server Applications with C#
I listed some resources on asynchronous programming for .NET server applications with C# which consist of blog posts, presentations and podcasts.
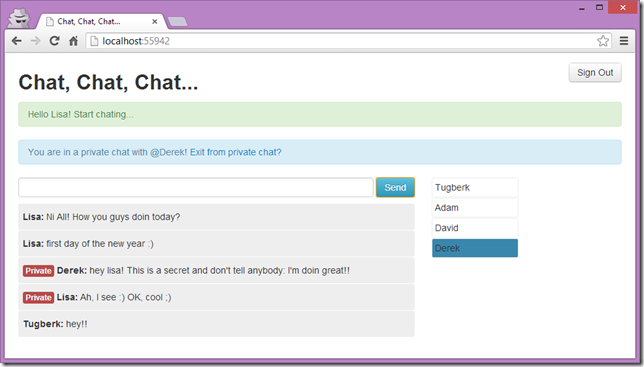
Mapping ASP.NET SignalR Connections to Real Application Users
One of the common questions about SignalR is how to broadcast a message to specific users and the mapping the SignalR connections to your real application users is the key component for this.
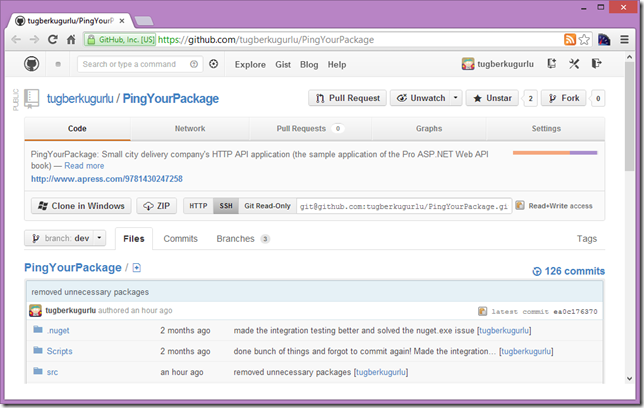
Pro ASP.NET Web API's Sample Project (PingYourPackage) Source Code is Up on GitHub
We wanted to give you an early glimpse on the Pro ASP.NET Web API's sample application(PingYourPackage) and its source code is now up on GitHub.
Why am I not Using NancyFx Instead of ASP.NET MVC / Web API
Why am I not using NancyFx instead of ASP.NET MVC / Web API? Because of a very important and vital missing part with NancyFx: asynchrony!

SignalR - Real-time Web Applications Webcast Recording (In Turkish) is Available
SiganlR - Real-time Web Applications webcast recording (in Turkish) is available. The video is available on NedirTV and Vimeo.

Advanced ASP.NET Web API Webcast Offline Recording (In Turkish) is Available
Advanced ASP.NET Web API Webcast Offline Recording (In Turkish) is Available
Advanced ASP.NET Web API Webcast Slide and Codes
The slide and the full source code of the Advanced ASP.NET Web API webcast (Turkish) is available.
Newsflash! ASP.NET Web API does not Sit on Top of ASP.NET MVC! In Fact, It does not Sit on Top of Anything
One of the common misconceptions about ASP.NET Web API is that it is being built on top of ASP.NET MVC. Today, I am going to break it!

Pro ASP.NET Web API Book is Available on Amazon for Pre-order
Two days ago, I blogged about the availability of the Pro ASP.NET Web API Book through Apress Alpha Program. Today, the Pro ASP.NET Web API book is now available on Amazon for pre-order

Pro ASP.NET Web API Book is Available Through Apress Alpha Program
I am proud to announce that the Pro ASP.NET Web API book is available through Apress Alpha Program and you can get access to the early bits and completed chapters now.
Streaming with New .NET HttpClient and HttpCompletionOption.ResponseHeadersRead
How to consume a streaming endpoint with new .NET System.Net.Http.HttpClient and the role of HttpCompletionOption.ResponseHeadersRead
.NET 4.5 to Support Zip File Manipulation Out of the Box
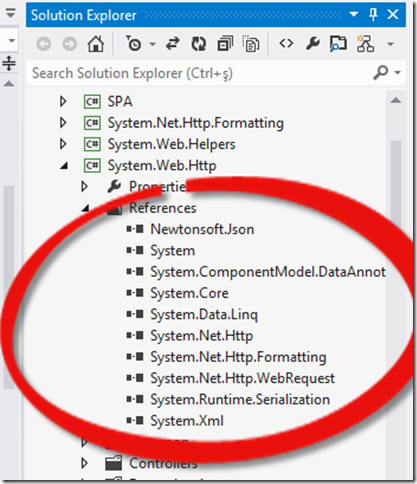
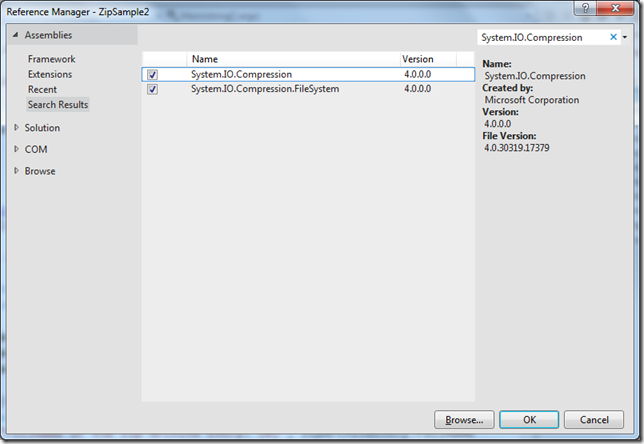
One of the missing feature of .NET framework was a support for Zip file manipulation. In .NET 4.5, we have an extensive support for manipulating zip archives.

Slides of My MS Web Platform & ASP.NET MVC 101 Talks
Today, I was at Computer Engineering Department of Mugla University and I gave two introduction talks on MS Web Platform and ASP.NET MVC 101.

WCF Web API Plays Nice With ELMAH - A Quick Introduction to WCF Web API HttpErrorHandler
See how WCF Web API Plays Nice With ELMAH. This blog post is a Quick introduction to WCF Web API HttpErrorHandler

Introduction to WCF Web API - New REST Face of .NET
This blog post will give you an introduction to WCF Web API and show you how to get started with WCF Web API along with Dependency Inject support with Ninject.
Check Instantly If Username Exists - ASP.NET MVC Remote Validation
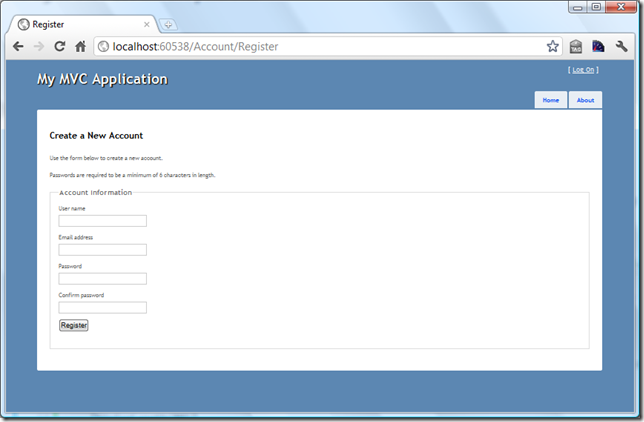
This blog post will walk you through on implementation and usage of ASP.NET MVC Remote Validation. As a sample, we will validate the availability of the username for membership registration.
Working With JQuery Ajax API on ASP.NET MVC 3.0 - Power of JSON, JQuery and ASP.NET MVC Partial Views
In this post, we'll see how easy to work with JQuery AJAX API on ASP.NET MVC and how we make use of Partial Views to transfer chunk of html from server to client with a toggle button example.
ASP.NET Web Forms : Calling Web Service Page Methods Using JQuery
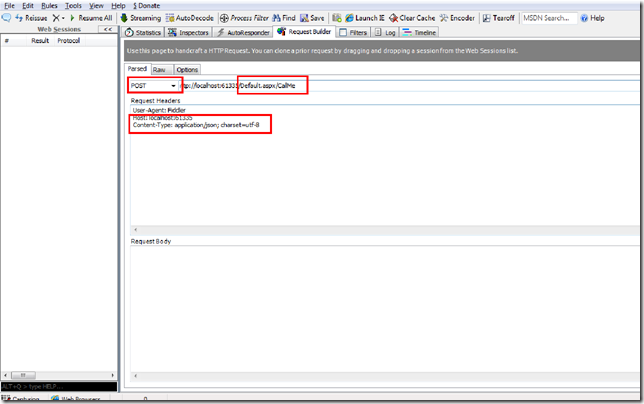
In this blog post we will see how to consume a web page methods using JQuery on ASP.NET Web Forms and use ASP.NET page methods as services. You will find some cool stuff about other things as well :)
MCTS 70-515, Failed but I'm Gonna Beat It Next Time - Throughout MCTS Exam Overview and Experience
Couple of days ago I took the Exam 70-515, TS: Web Applications Development with Microsoft .NET Framework 4 and I am gonna walk you through it in this post

Parent / Child View In a Single Table With GridView Control On ASP.NET Web Forms
This awesome blog post will demonstrate how to create a complete, sub-grouped product list in a single grid. Get ready for the awesomeness...

How To Handle Multiple Checkboxes From Controller In ASP.NET MVC - Sample App With New Stuff After MVC 3 Tools Update
In this blog post, we will see how to handle multiple checkboxes inside a controller in ASP.NET MVC. We will demonstrate a sample in order to delete multiple records from database.

We Love .NET 4 - Clean Web Control IDs with ClientIDMode Property to Static and Predictable
In this blog post, we will see how ClientIDMode property of Web Controls makes our lives easier. Also, we will demonstrate couple of scenarios on how it works...
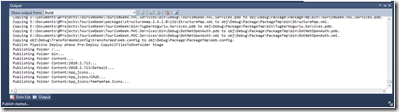
File By File Deployment Process with MSDeploy Inside Visual Studio
Have you ever used 'MSDeploy' inside Visual Studio 2010 and wished a nice process bar while publishing a web application? There is even a better way!

Local IIS 7.0 - CS0016: Could not write to output file / Microsoft.Net > Framework > v4.0.30319 > Temporary ASP.NET Files
Solution to an annoying error message! You are getting 'Could not write to output file 'c:\Windows\Microsoft.NET\Framework\....' message? You are at the right place.

Running ASP.NET MVC Under IIS 6.0 and IIS 7.0 Classic Mode : Solution to Routing Problem
In this blog post, we will see how to run ASP.NET MVC application under IIS 6.0 and IIS 7.0 classic mode with some configurations on IIS and Global.asax file...
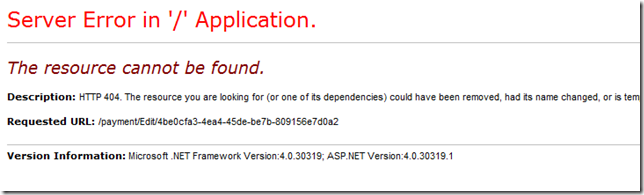
ASP.NET MVC : Throwing 404 Exceptions Manually From Controller When Model is Null
This post is a quick demonstration of how you can throw HttpException of 404 manually from a controller on ASP.NET MVC when the model you're passing is null

Microsoft MIX11 : Students & Academic Staff Discount is Available For the Conference
Microsoft MIX11 : Students & Academic Staff Discount is Available For the Conference / The chance that every geek student wants to catch!

SQL Injection vs. Lethal Injection / Protection Against SQL Injection
SQL Injection and Lethal Injection... They are both dangerous and they can be easily fatal. But how? What is SQL Injection and how it can effect my project? The answers are in this blog post.
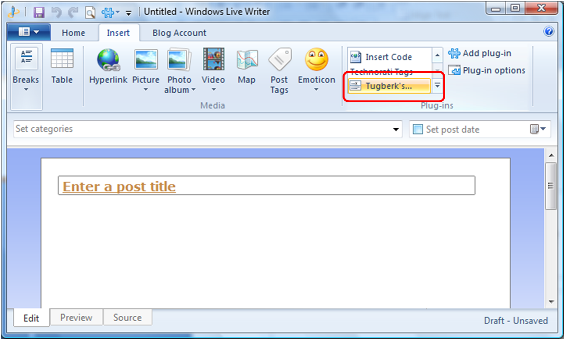
Windows Live Writer Codehighlighting Plugin For Alex Gorbatchev's SyntaxHighlighter
Windows Live Writer Codehighlighting Plugin For Alex Gorbatchev's SyntaxHighlighter is available on codeplex
Deployment of ASP.Net MVC 3 RC 2 Application on a Shared Hosting Environment Without Begging The Hosting Company
After the release of ASP.Net MVC RC 2, we are now waiting for the RTM release but some of us wanna use RC 2 already... But how to deploy it on a shared hosting acount is the mind-exploding problem...

Custom Errors on ASP.Net MVC - redirectMode="ResponseRewrite" Issue
I assume that some of you folks have tried that in your ASP.Net MVC applications and try to figure out why it doesn't work. Well, I have figured it out...

Sending E-mail to All List of Membership Users with ASP.Net Using Built-in Membership API
Most of the Asp.Net developers are using Membership class of Asp.Net and in this blog post we will see how to send e-mail to all of the membership users at once...
How to Delete a Previously Created Cookie With C# ASP.Net / Deleting Cookie ASP.Net
You created a cookie on you asp.net forms application now you would like to delete it. This quick article show how to do the trick...
ASP.NET Security Vulnerability Has Been Detected by Microsoft
On the 17th of Sepetember in 2010, Microsoft released a advisory for a very serious ASP.NET vulnerability which will cause to view data, such as the View State
Country DropDownList - ListItems of A Country Dropdownlist includes All Countries, Country Dropdownlist Component
Country DropDownList for Asp.NET developers ! Save a lot of time by copying and pasting this code to your application for a country dropdownlist. Do not create it from scratch :)
How To Use C# (C Sharp) Switch Case, Switch Case Samples
After you read this article, you will be able to use the 'Switch Case' Function on your C# Projects. This function becomes so handy with DropDownList & RadioButtonList !
How to Validate A CheckBox in ASP.Net 3.5 / Checkbox Validation Control Sample Code in ASP.Net, C# (C Sharp) And Visual Basic
This article will give you an idea to validate a checkbox in ASP.Net 3.5 ! It is so easy to implement and so handy to use !
ASP.Net Chart Control On Shared Hosting Environment, Chartimagehandler / Parser Error Problem Solution
ASP.Net Chart Control On Shared Hosting Envronment (Parser Error) - Deployment of Chart Controls On Shared Hosting Environment Properly...

Hey, I'm Tugberk 👋
Coder 👨🏻💻, Speaker 🗣, Author 📚, ex-Microsoft MVP 🕸, Blogger 💻
I live in London, UK 🏡
