Setting up a MongoDB Replica Set with Docker and Connecting to It With a .NET Core App
Easily setting up realistic non-production (e.g. dev, test, QA, etc.) environments is really critical in order to reduce the feedback loop. In this blog post, I want to talk about how you can achieve this if your application relies on MongoDB Replica Set by showing you how to set it up with Docker for non-production environments.
31 January 2018
7 minutes read
Related Posts


Easily setting up realistic non-production (e.g. dev, test, QA, etc.) environments is really critical in order to reduce the feedback loop. In this blog post, I want to talk about how you can achieve this if your application relies on MongoDB Replica Set by showing you how to set it up with Docker for non-production environments.
Hold on! I want to watch, not read!
I got you covered there! I have also recorded a ~5m covering the content of this blog post, where I also walks you through the steps visually. If you find this option useful, let me know through the comments below and I can aim harder to repeat that :)
What are we trying to do here and why?

If you have an application which works against a MongoDB database, it’s very common to have a replica set in production. This approach ensures the high availability of the data, especially for read scenarios. However, applications mostly end up working against a single MongoDB instance, because setting up a Replica Set in isolation is a tedious process. As mentioned at the beginning of the post, we want to reflect the production environment to the process of developing or testing the software applications as much as possible. The reason for that is to catch unexpected behaviour which may only occur under a production environment. This approach is valuable because it would allow us to reduce the feedback loop on those exceptional cases.
Docker makes this all easy!
This is where Docker enters into the picture! Docker is containerization technology and it allows us to have repeatable process to provision environments in a declarative way. It also gives us a try and tear down model where we can experiment and easily start again from the initial state. Docker can also help us with easily setting up a MongoDB Replica Set. Within our Docker Host, we can create Docker Network which would give us the isolated DNS resolution across containers. Then we can start creating the MongoDB docker containers. They would initially be unaware of each other. However, we can initialise the replication by connecting to one of the containers and running the replica set initialisation command. Finally, we can deploy our application container under the same docker network.

There are a handful of advantages to setting up this with Docker and I want to specifically touch on some of them:
- It can be automated easily. This is especially crucial for test environments which are provisioned on demand.
- It’s repeatable! The declarative nature of the Dockerfile makes it possible to end up with the same environment setup even if you run the scripts months later after your initial setup.
- Familiarity! Docker is a widely known and used tool for lots of other purposes and familiarity to the tool is high. Of course, this may depend on your development environment
Let’s make it work!
First of all, I need to create a docker network. I can achieve this by running the "docker network create” command and giving it a unique name.
docker network create my-mongo-cluster
The next step is to create the MongoDB docker containers and start them. I can use “docker run” command for this. Also, MongoDB has an official image on Docker Hub. So, I can reuse that to simplify the acqusition of MongoDB. For convenience, I will name the container with a number suffix. The container also needs to be tied to the network we have previously created. Finally, I need to specify the name of the replica set for each container.
docker run --name mongo-node1 -d --net my-mongo-cluster mongo --replSet “rs0"
First container is created and I need to run the same command to create two more MongoDB containers. The only difference is with the container names.
docker run --name mongo-node2 -d --net my-mongo-cluster mongo --replSet "rs0"
docker run --name mongo-node3 -d --net my-mongo-cluster mongo --replSet “rs0"
I can see that all of my MongoDB containers are at the running state by executing the “docker ps” command.

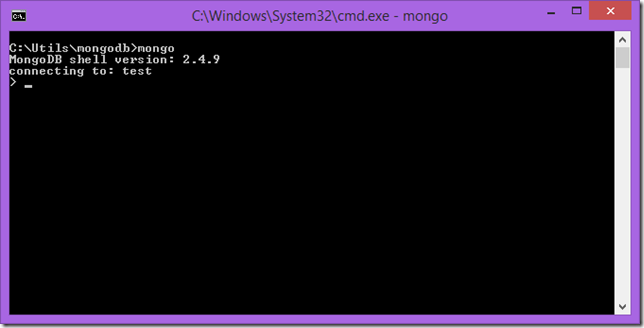
In order to form a replica set, I need to initialise the replication. I will do that by connecting to one of the containers through the “docker exec” command and starting the mongo shell client.
docker exec -it mongo-node1 mongo

As I now have a connection to the server, I can initialise the replication. This requires me to declare a config object which will include connection details of all the servers.
config = {
      "_id" : "rs0",
      "members" : [
          {
              "_id" : 0,
              "host" : "mongo-node1:27017"
          },
          {
              "_id" : 1,
              "host" : "mongo-node2:27017"
          },
          {
              "_id" : 2,
              "host" : "mongo-node3:27017"
          }
      ]
  }
Finally, we can run “rs.initialize" command to complete the set up.
You will notice that the server I am connected to will be elected as the primary in the replica set shortly. By running “rs.status()”, I can view the status of other MongoDB servers within the replica set. We can see that there are two secondaries and one primary in the replica set.
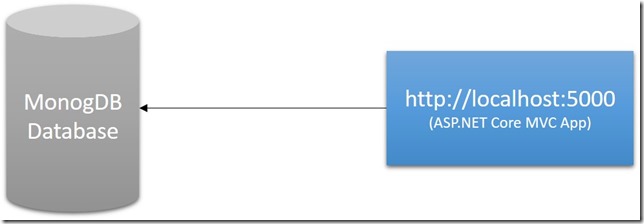
.NET Core Application
As a scenario, I want to run my .NET Core application which writes data to a MongoDB database and start reading it in a loop. This application will be connecting to the MongoDB replica set which we have just created. This is a standard .NET Core console application which you can create by running the following script:
dotnet new console
The csproj file for this application looks like below.
<Project Sdk="Microsoft.NET.Sdk">
  <PropertyGroup>
    <OutputType>Exe</OutputType>
    <TargetFramework>netcoreapp2.0</TargetFramework>
  </PropertyGroup>
  <ItemGroup>
    <PackageReference Include="Bogus" Version="18.0.2" />
    <PackageReference Include="MongoDB.Driver" Version="2.4.4" />
    <PackageReference Include="Polly" Version="5.3.1" />
  </ItemGroup>
</Project>
Notice that I have two interesting dependencies there. Polly is used to retry the read calls to MongoDB based on defined policies. This bit is interesting as I would expect the MongoDB client to handle that for read calls. However, it might be also a good way of explicitly stating which calls can be retried inside your application. Bogus, on the other hand, is just here to be able to create fake names to make the application a bit more realistic :)
Finally, this is the code to make this application work:
partial class Program
{
    static void Main(string[] args)
    {
        var settings = new MongoClientSettings
        {
            Servers = new[]
            {
                new MongoServerAddress("mongo-node1", 27017),
                new MongoServerAddress("mongo-node2", 27017),
                new MongoServerAddress("mongo-node3", 27017)
            },
            ConnectionMode = ConnectionMode.ReplicaSet,
            ReplicaSetName = "rs0"
        };

        var client = new MongoClient(settings);
        var database = client.GetDatabase("mydatabase");
        var collection = database.GetCollection<User>("users");

        System.Console.WriteLine("Cluster Id: {0}", client.Cluster.ClusterId);
        client.Cluster.DescriptionChanged += (object sender, ClusterDescriptionChangedEventArgs foo) =>
        {
            System.Console.WriteLine("New Cluster Id: {0}", foo.NewClusterDescription.ClusterId);
        };

        for (int i = 0; i < 100; i++)
        {
            var user = new User { Id = ObjectId.GenerateNewId(), Name = new Bogus.Faker().Name.FullName() };
            collection.InsertOne(user);
        }

        while (true)
        {
            var randomUser = collection.GetRandom();
            Console.WriteLine(randomUser.Name);

            Thread.Sleep(500);
        }
    }
}
This is not the most beautiful and optimized code ever but should demonstrate what we are trying to achieve by having a replica set. It's actually the GetRandom method on the MongoDB collection object which handles the retry:
public static class CollectionExtensions
{
    private readonly static Random random = new Random();

    public static T GetRandom<T>(this IMongoCollection<T> collection)
    {
        var retryPolicy = Policy
            .Handle<MongoCommandException>()
            .Or<MongoConnectionException>()
            .WaitAndRetry(2, retryAttempt =>
                TimeSpan.FromSeconds(Math.Pow(2, retryAttempt))
            );

        return retryPolicy.Execute(() => GetRandomImpl(collection));
    }

    private static T GetRandomImpl<T>(this IMongoCollection<T> collection)

    {
        return collection.Find(FilterDefinition<T>.Empty)
            .Limit(-1)
            .Skip(random.Next(99))
            .First();
    }
}
I will run this through docker as well and here is the dockerfile for this:
FROM microsoft/dotnet:2-sdk

COPY ./mongodb-replica-set.csproj /app/
WORKDIR /app/
RUN dotnet --info
RUN dotnet restore
ADD ./ /app/
RUN dotnet publish -c DEBUG -o out
ENTRYPOINT ["dotnet", "out/mongodb-replica-set.dll"]
When it starts, we can see that it will output the result to the console:

Prove that It Works!
In order to demonstrate the effect of the replica set, I want to take down the primary node. First of all, we need to have look at the output of rs.status command we have previously ran in order to identify the primary node. We can see that it’s node1!

Secondly, we need to get the container id for that node.

Finally, we can kill the container by running the “docker stop command”. Once the container is stopped, you will notice that application will gracefully recover and continue reading the data.


Hey, I'm Tugberk 👋
Coder 👨🏻💻, Speaker 🗣, Author 📚, ex-Microsoft MVP 🕸, Blogger 💻
I live in London, UK 🏡
